
Kyvos supercharges Tableau to deliver lightning-fast performance on modern data platforms at an unprecedented scale. Our patented OLAP technology provides fast and interactive query responses on massive amounts of data. By creating a BI acceleration layer directly on the cloud and on-premise data lakes, Kyvos allows users to analyze trillions of rows on their Tableau dashboards with sub-second response times.
Kyvos offers seamless, single sign-on integration with Tableau on the cloud or on-premises, making data instantly accessible to decision-makers. With the newly launched Kyvos Connector for Tableau, users can connect to their data in just a few clicks. In this post, I will cover how you can connect to Kyvos cubes from your Tableau interface using the custom Kyvos Tableau Connector.
To connect to Kyvos using the custom connector, you must first download the Kyvos ODBC Driver and install it. You can download the driver here. The driver is also available on the Tableau website.
During installation, a default System DSN is created with the name Kyvos ODBC. You can use this default System DSN to connect to Kyvos BI Server from Tableau.
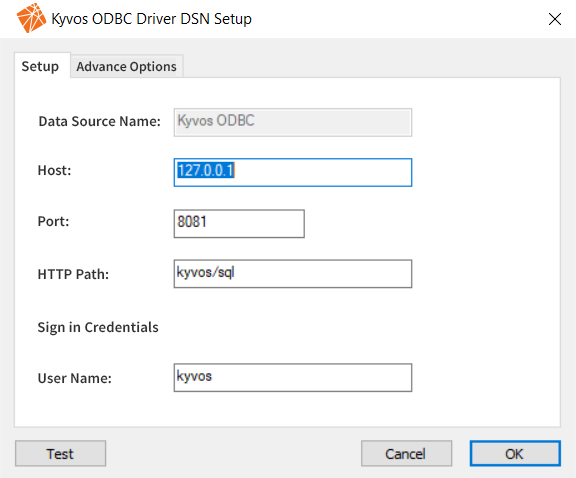
Figure 1: Kyvos ODBC Driver DSN Setup
Once the Kyvos ODBC driver is installed, you can connect Tableau to the Kyvos cubes using any of the following two methods:
- Through Tableau interface
- Using Tableau Data Source File
Connecting to Kyvos cubes through Tableau interface
Here are the steps that can help you get productive right away using the Kyvos Tableau Connector.
To connect Tableau to a Kyvos cube and set up the data source, you need the following information:
- Name of the server that hosts the database you want to connect
- Port number for client requests
- HTTP path to the server
- User name and password
- Are you connecting to an SSL server?
- (Optional) Initial SQL statement to run every time Tableau connects
On the Tableau window, select the Kyvos option from the To a Server list on the navigation pane.
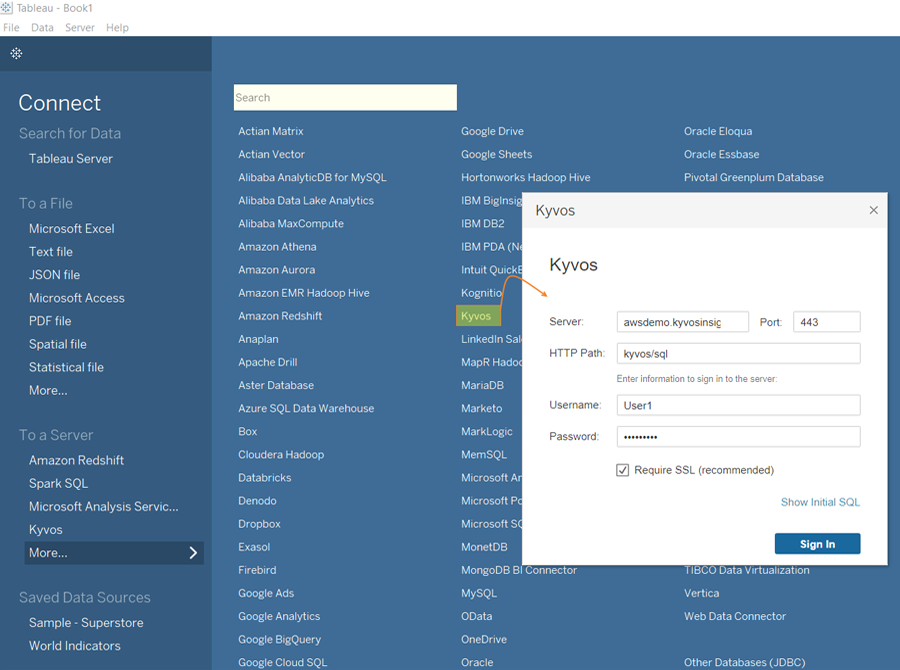
Figure 2: Tableau connectors – Kyvos dialog box
- In the displayed Kyvos dialog box, enter your connection information as
- In the Server field, type the IP address or hostname of your Kyvos BI server.
- In the Port field, type the number of the TCP port that the Kyvos BI server uses to listen for client requests.
- In the HTTP Path field, type your client path.
- In the Username field, type your Kyvos BI Server Username.
- In the Password field, type your Kyvos BI Server Password
- Select the Require SSL checkbox if connecting to an SSL server.
- (Optional) Select Initial SQL to specify a SQL command to run at the beginning of every connection, such as when you open the workbook, refresh an extract, sign in to Tableau Server, or publish to Tableau Server. For more information, see Run Initial SQL.
- Click Sign In. On the Data Source page, select your Schema then select Table that you want to browse in Tableau.
- The Kyvos data store is loaded in Tableau. You can now use your data to create reports.
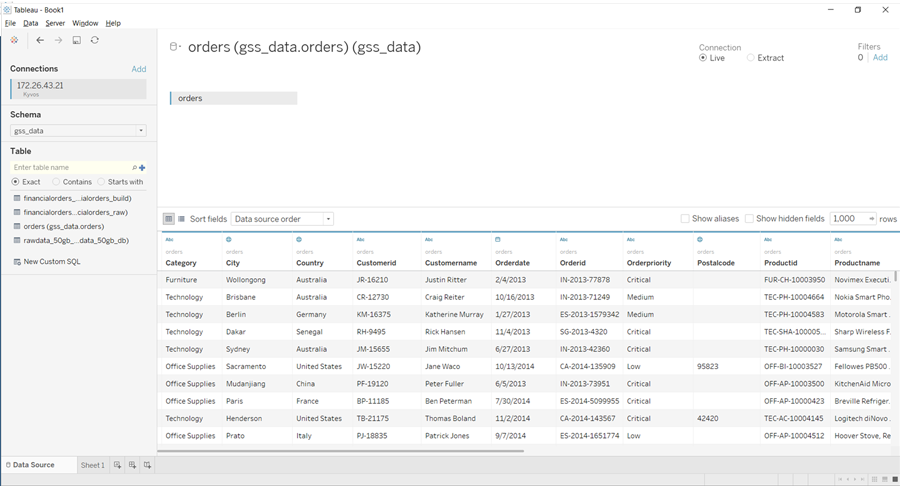
Figure 3: Kyvos data store in Tableau
Here’s a sample Tableau worksheet with the Kyvos connection.
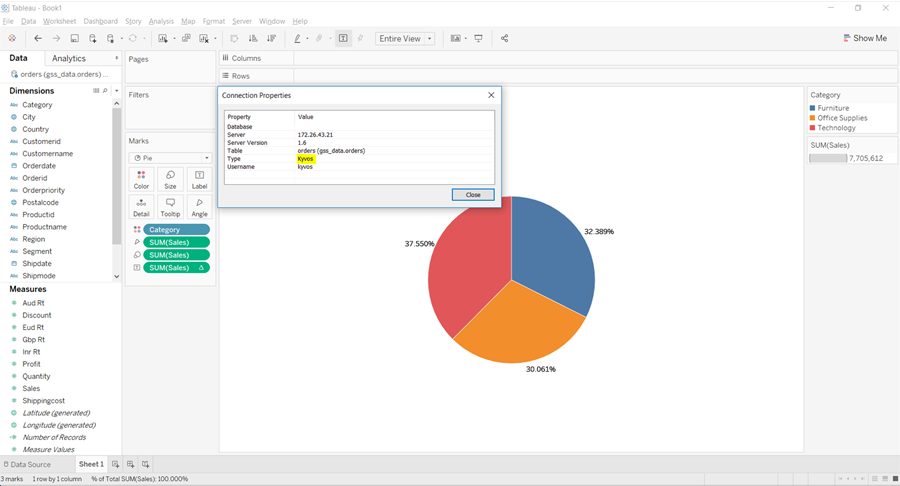
Figure 4: Tableau worksheet with Kyvos connection
Connecting to Kyvos cubes using Tableau Data Source connection
When you use a Tableau Data Source (TDS) file, you will see the dimensions, hierarchies, measures, levels, and attributes as they are configured in the Kyvos cube. If you generate a TDS file from the Kyvos web portal and publish it to the Tableau Server, you don’t need to provide the connection details to your users. A TDS file contains all the metadata of the cube and connection information.
Creating TDS File from Kyvos web portal
You can directly create a TDS file from the Kyvos web portal using the Export Cube Metadata feature.
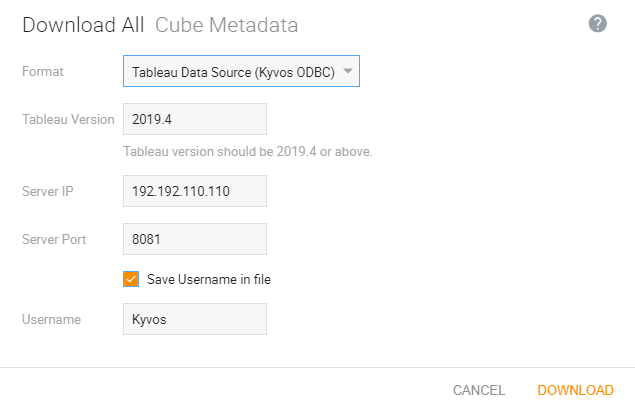
Figure 5: Creating a TDS file from Kyvos Web Portal
- In the Download Selected Cube Metadata dialog box, use the Format drop-down to select the type of TDS file that you want to download according to the connectivity that you are using.
- For Tableau version 2019.4 and above, you can select the Tableau Data Source (Kyvos ODBC) option. In this case, you can use the Kyvos Tableau connector to connect to the Kyvos cubes.
- Enter the details in Tableau Version, Server IP/Hostname, Server Port, and optionally the username used to connect. Click Download to save the file on your computer.
Connecting to Kyvos cubes using TDS File on Tableau Server or Tableau Desktop
Once you have downloaded the TDS file, you can connect Kyvos cubes using this TDS file on Tableau Server and Tableau Desktop. For this, open the TDS file in Tableau, and enter your credentials and click Sign In.
Optionally, edit the connection details by using the Edit Connection option.
Publish the TDS file and allow Tableau to pre-load the cube metadata. Your cube is now ready for your users.
To know more about how Kyvos supercharges Tableau’s performance on massive data, you can request a demo now.